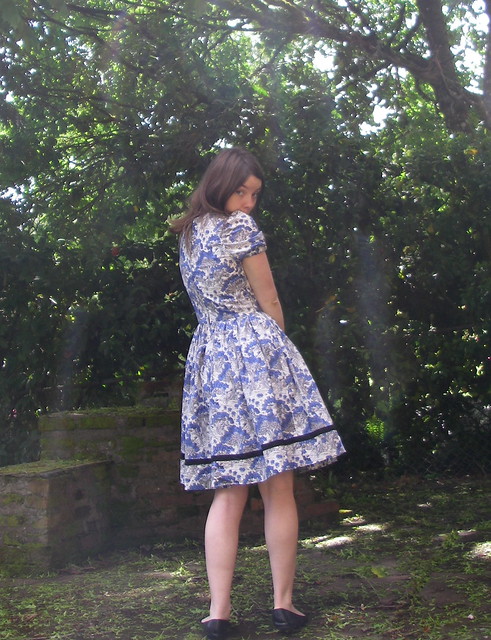
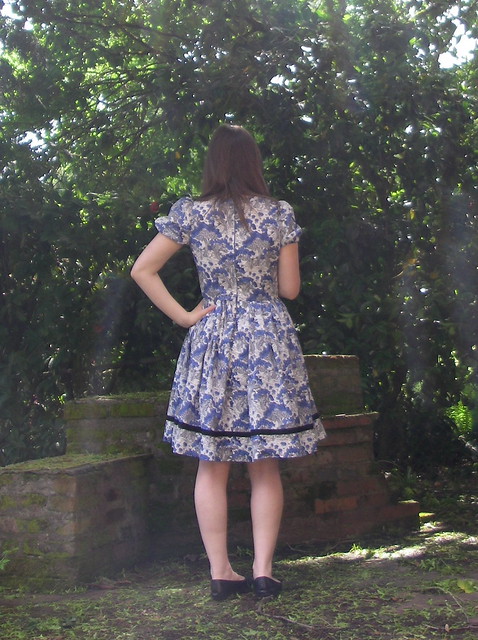
a blue dress

dress

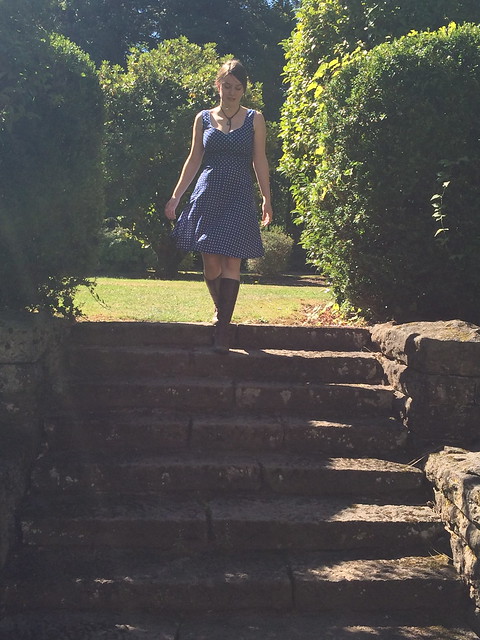
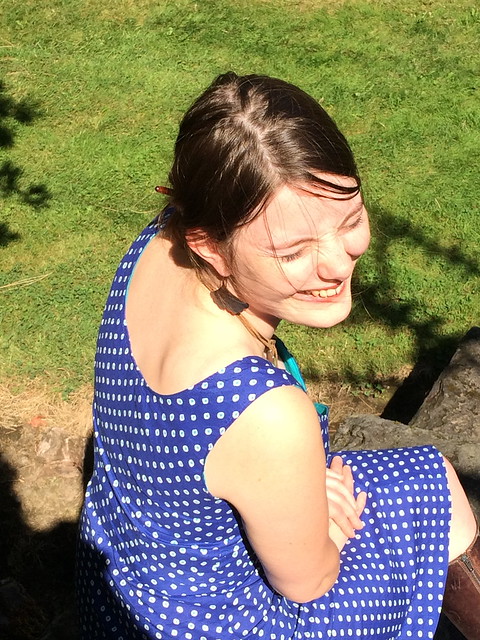
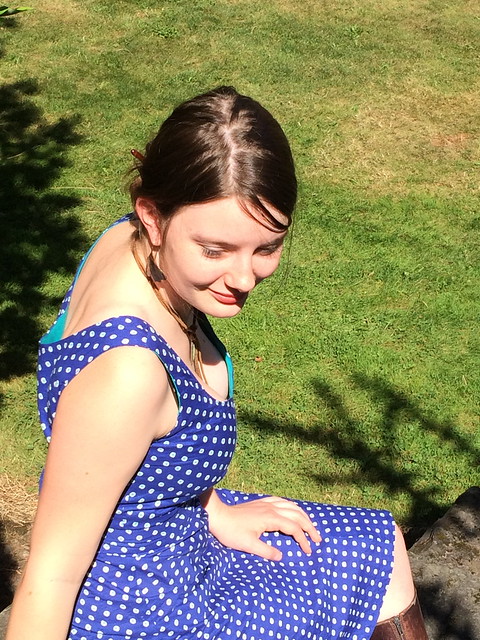
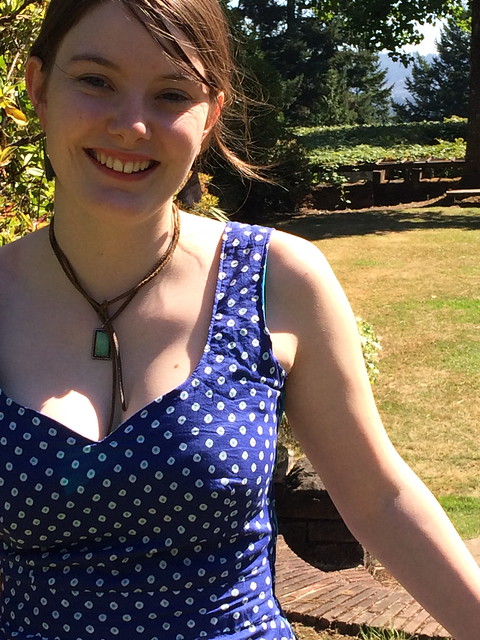
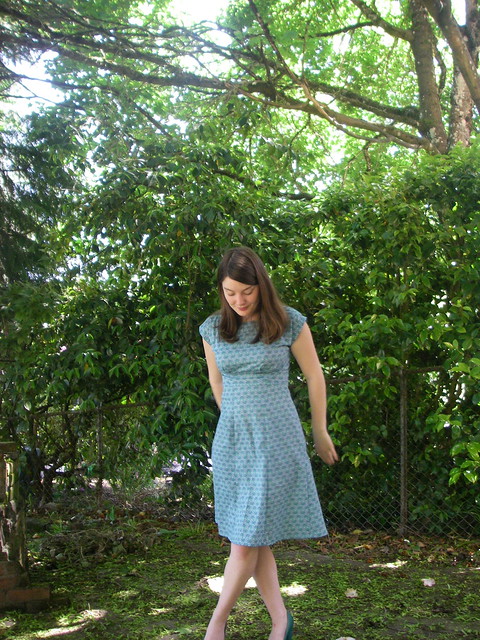
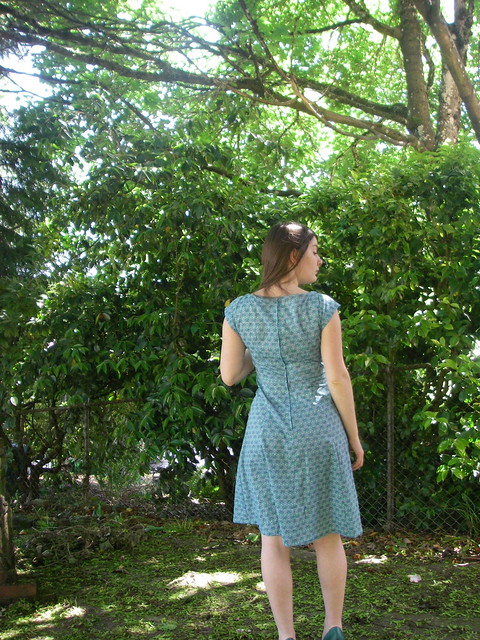
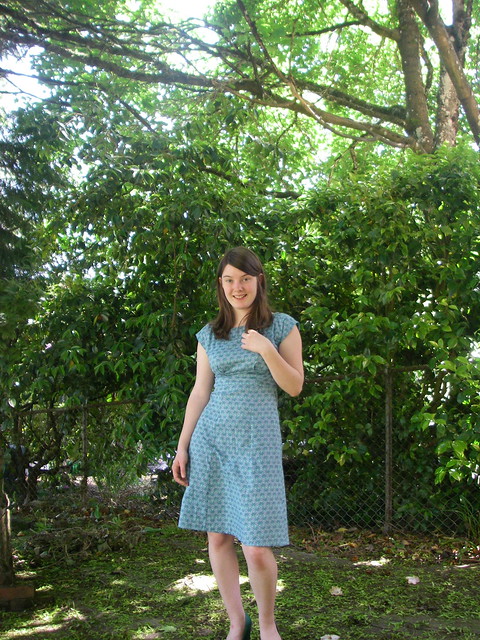
It seems as though nearly everything I sewed this summer was blue. My Lisette lawn Anna, my Alice dress (since disassembled and waiting for pattern inspiration to strike), my nautical shirtdress, two bridesmaid dresses for my friend’s wedding… And this dress, which I actually made over a month ago for the Summer Sundress Sewalong, but am only just blogging now!

dress

In the middle of sewing the bridesmaid dresses, I decided that I wanted to sew myself something. Naturally. But what with full time work I didn’t feel like I had a great deal of time to sew at all, much less things that weren’t related to the fast approaching bridesmaid-dress deadline, and so my dress came out a little slapdash and messy as I tried to cut corners.

dress

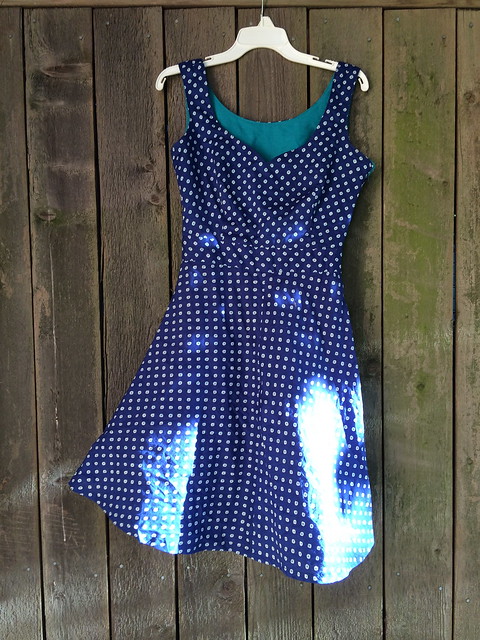
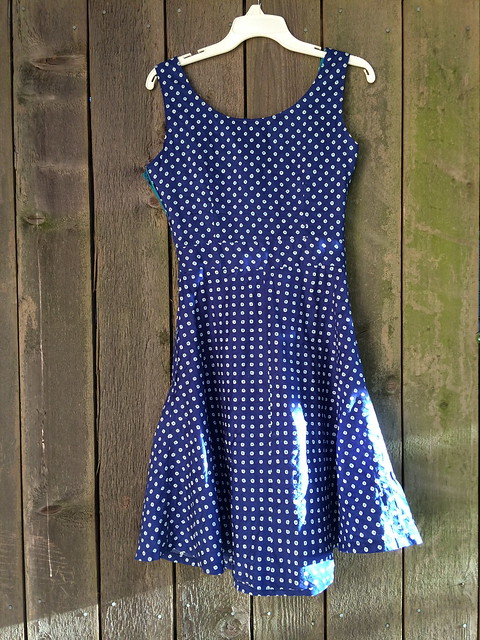
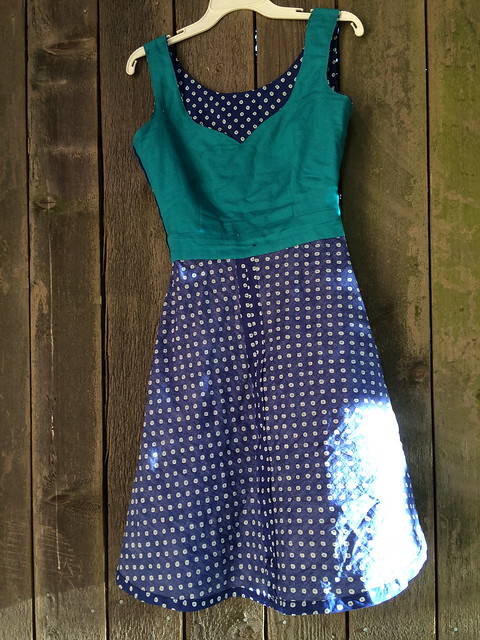
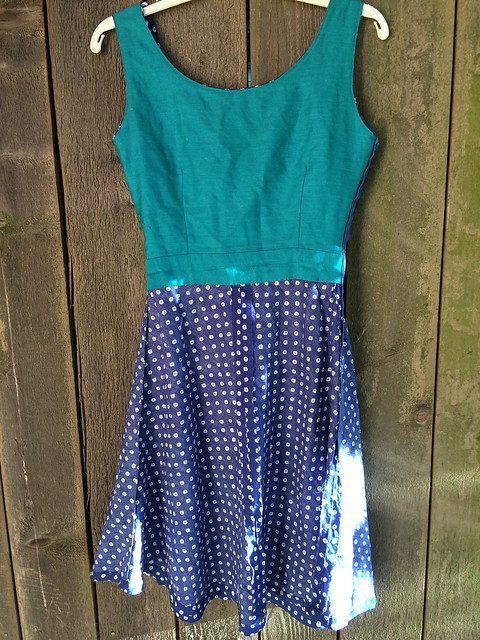
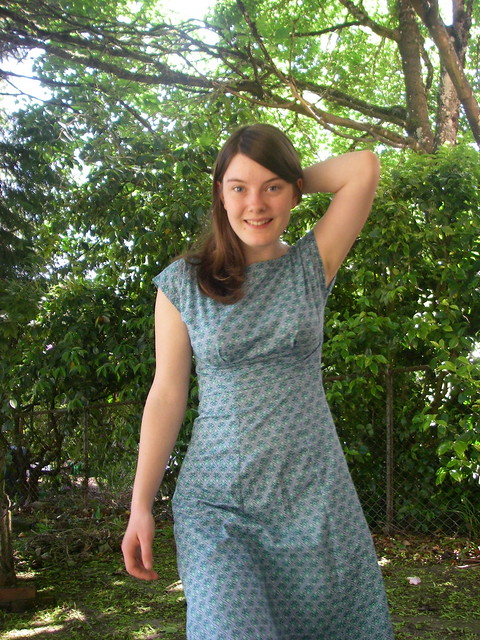
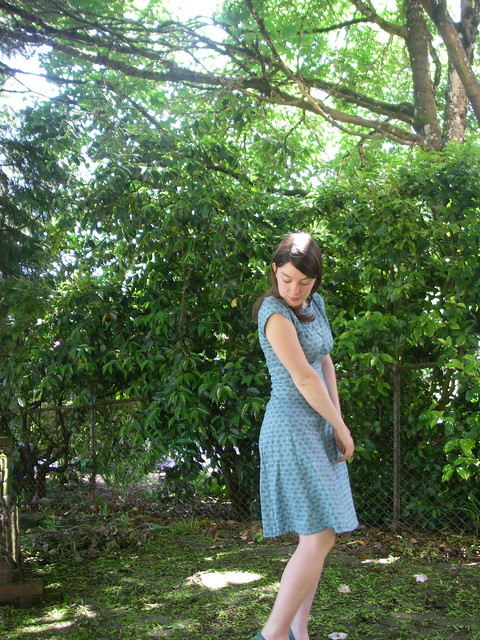
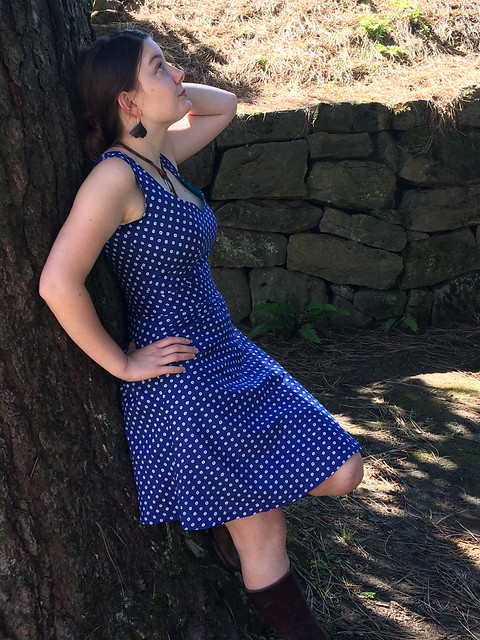
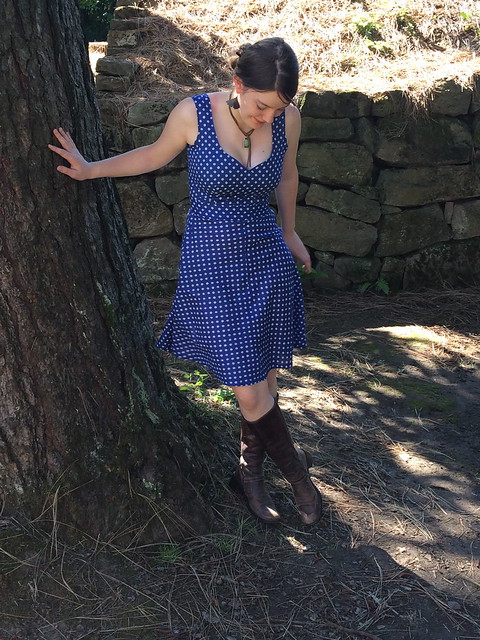
The fabric is a Lisette lawn that my mother gave me, with rough, almost diamond-shaped white polka dots that have little teal polka dots in the centers. The pattern is a mash-up of my own invention. I knew when I saw the fabric that I wanted a fit-and-flare with a sweetheart neckline, a waistband, and a bias-cut skirt (a la the Sewaholic Hollyburn). The bodice was easy, as I used a heavily modified version of McCall’s 5927 (I added the sweetheart, and scooped out the back, and shortened it to accommodate a waistband), which I used for my bridesmaid dress–that way I could call it a wearable muslin! The skirt was trickier–I wanted a Hollyburn skirt, but I can’t justify spending money on such a simple skirt pattern that I could draft myself. BUT, I couldn’t just draft it myself without feeling guilty, because you’re supposed to support indie pattern designers and all that, rather than blatantly copy their designs. Which I would love to do, if I could afford it, but I can’t.

dress

In the end I went with a slimmer bias-cut skirt pattern that I took off of a RTW skirt last fall, and I really like the shape. I wear a lot of full skirts but lately I have been feeling that I want a slimmer line. The bias-cut nature of the skirt turned out to be quite disappointing, as I realized after cutting the first piece that the polka dots are printed on diagonally, so that rather than forming a nice V on the center seams, they would go straight up and down. “Ah, whatever,” I said, and kept cutting. (I did actually consider making the skirt into a half-circle cut on-grain, but my fabric conservation instincts got the better of me, and I decided not to waste the skirt piece I had already cut.)

front

back

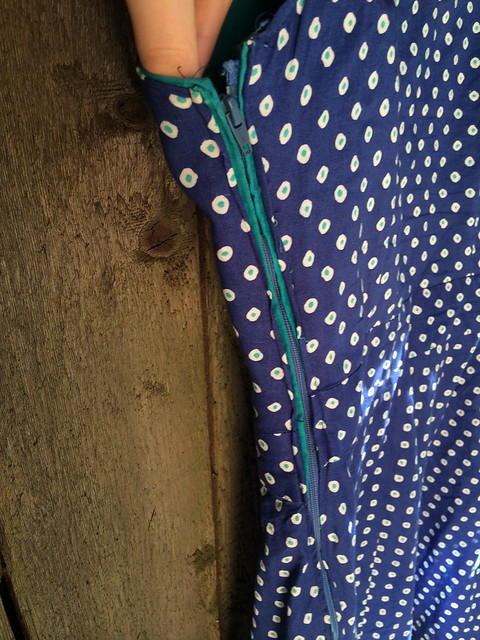
The slapdash nature of this dress means that it is definitely not without its problems. I need a giant swayback adjustment to my skirt pieces, and the hem is longer in front than back due to the swayback (easily fixed though). The bodice is a little tight in the bust (and after looking at these pictures, damn it is low cut), and the waistband is about half an inch too long. I made a hot mess of the zipper since I didn’t want to “waste” too much time handsewing, and the pattern matching on the center seams is, frankly, abysmal.

zipper

Another thing I noticed is that the back gapes whenever I put my shoulders back, which does not exactly encourage me to improve my posture!

Normal (bonus trying-to-look-into-the-sun face):

back

Shoulder back:

back gape

See? Gaping! Any suggestions on how to fix this? Should I take out width and risk it being too tight, or is this just normal on low backs?

OH WELL! I still think it’s pretty. And since we will eventually be going into cooler weather, the flaws will mostly be covered up by sweaters, so no harm done.

inside out

inside out back

And the insides are tidy. There will be some retroactive seam finishing when I get my zigzag machine back from the shop, but it hasn’t fallen apart yet, so we’ll count it as a win!
bodice

shirts for ryan

There’s something very satisfying about making menswear–well, men’s button-down shirts, anyway, as that’s the only menswear I’ve made. The fitting is easier (or maybe I’ve just been lucky), and the styles tend to be looser and not have any darts, which allows you to get right down to the actual construction, which has lots of lovely precise-but-not-too-fiddly details to work on getting perfect.

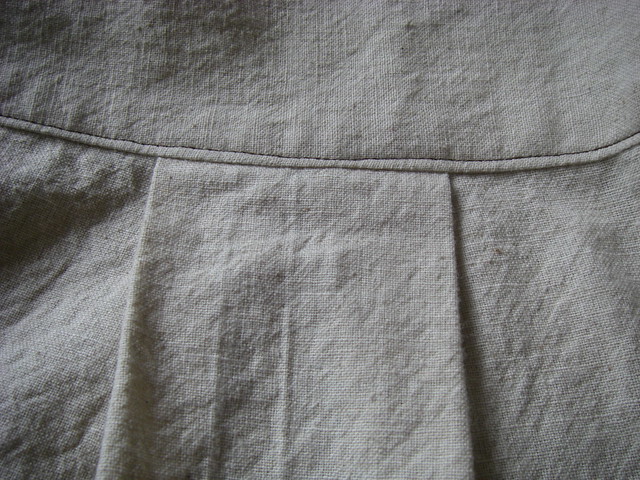
…Like pleats…

pleat

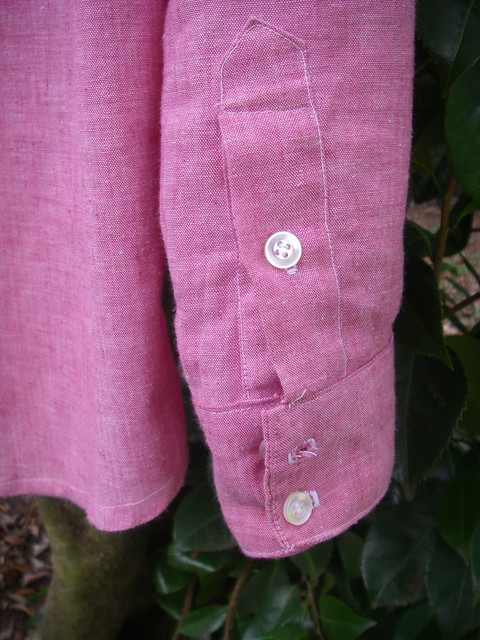
…and plackets…

cuff 1

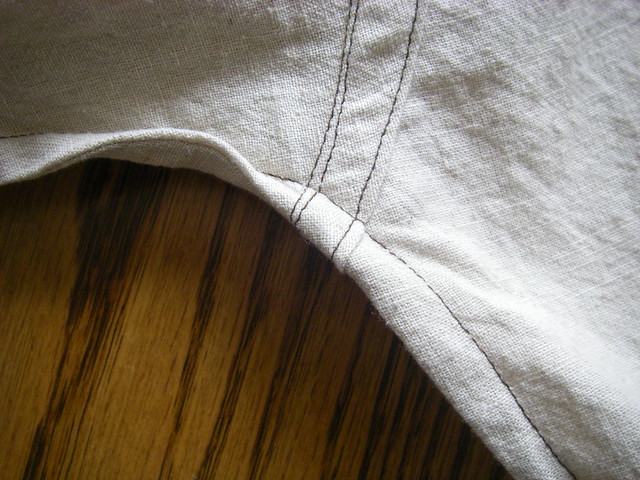
…and seams flat-felled and french…

seams

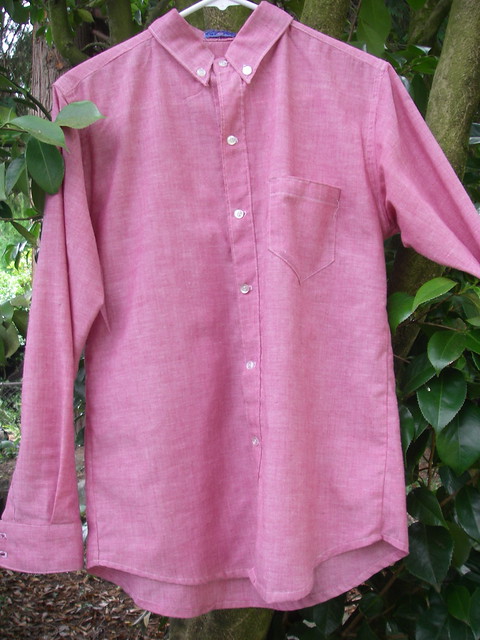
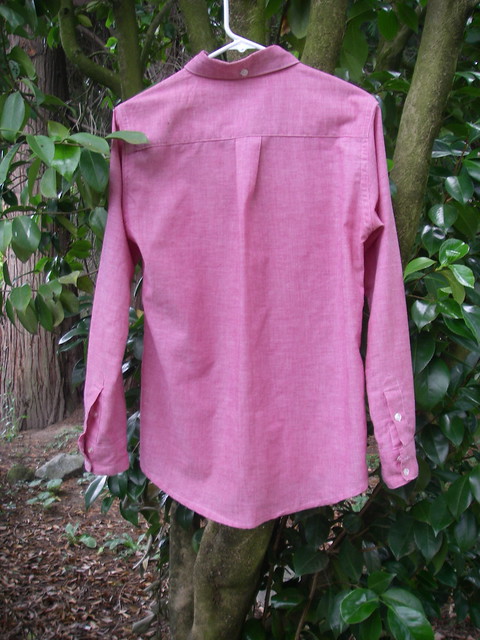
I have made Ryan (my boyfriend, for those not in the know) two shirts over the last year. The first one was sewn up last summer out of a length of pink chambray found at a yard sale. At the time he owned a nice pale blue oxford that he wore all the time, so I took a pattern off that, narrowed the body slightly, and lengthened the sleeves.

front 1

back 1

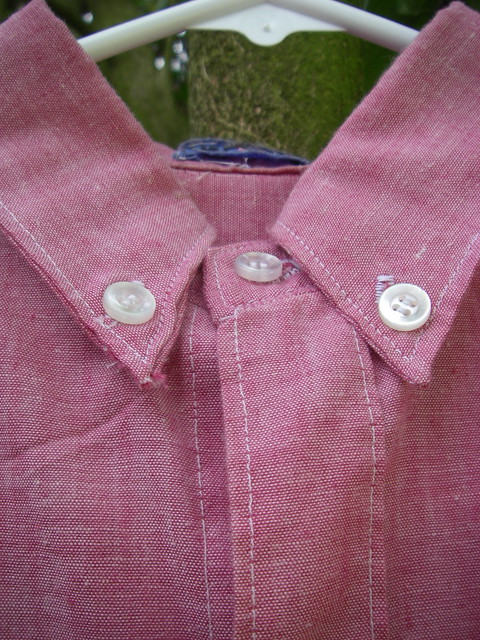
The first shirt was made pre-buttonhole-machine, so I hand-stitched every buttonhole, which is not very nice-looking if you are looking close… I also put three buttons on each cuff, one on each collar point, and one on the back of the collar, which is Way Too Many Buttons, especially when you’re doing your buttonholes by hand.

collar 1

(I also embroidered a little tag, which is that blue scrap you see in the back of the collar.)

There were other fiddly bits, like my first ever collar stand, which didn’t turn out too great, and I insisted on skipping the interfacing because that’s what I do. It does make a difference though, having interfaced pieces. You get a much crisper look.

Overall I was really pleased with it as my first proper shirt, and Ryan’s worn it a fair bit so I’d count it as a success!

front 2

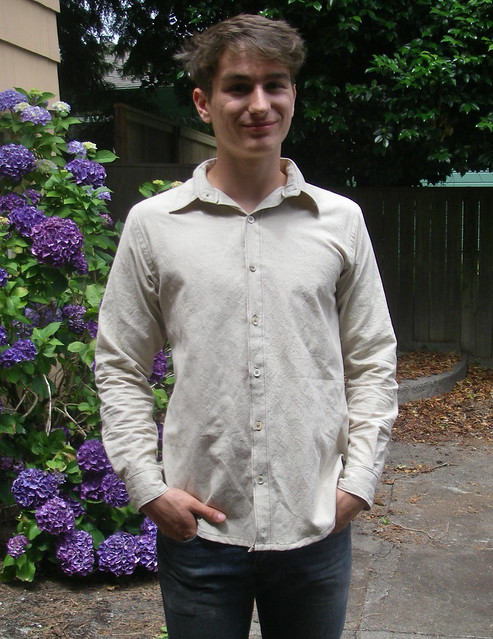
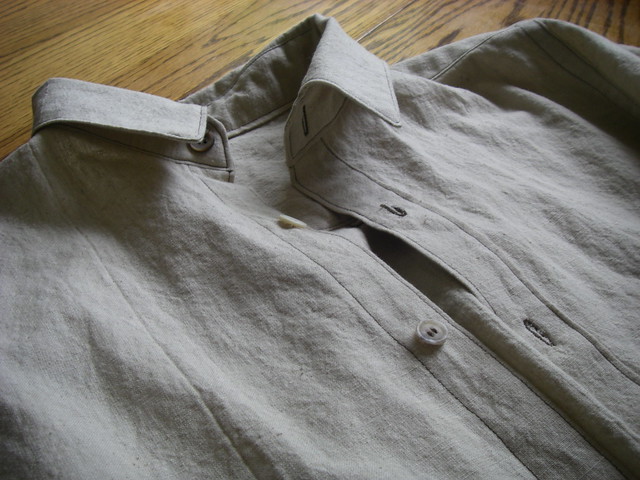
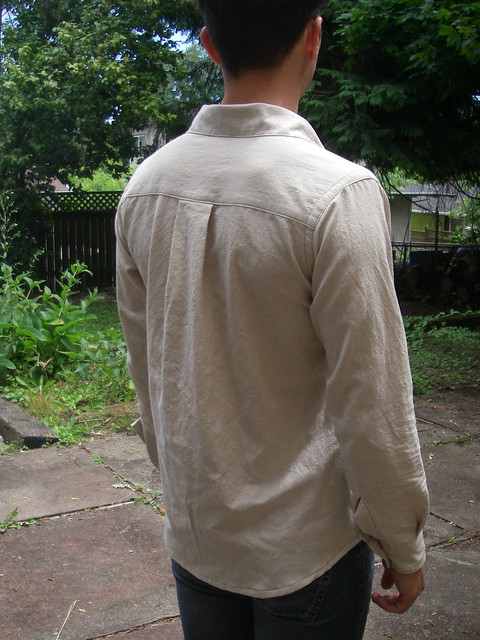
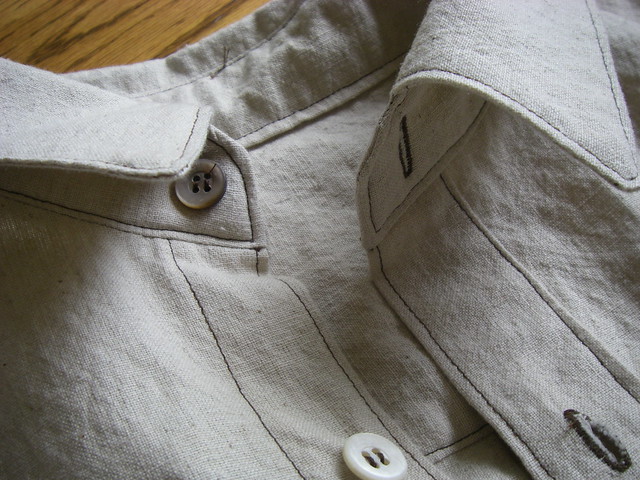
Shirt number two was made this summer. I’d been wanting to make him another shirt, but never seemed to have suitable fabric, until I dug up this lovely un-dyed linen. I had plans to dye half of it blue to replicate the (now lost) original blue button-up, and also to make an undyed, more casual version for Ryan’s trip to Italy to excavate a Roman villa (jealous? I am).

buttons

(I still haven’t got around to dying the other half of the linen, and to tell the truth, it is very narrow fabric so I’m not sure I can get another shirt out of it, but we’ll see, eventually.)

back 2

Back to the shirt! The only alteration was to add an inch and a half to the center back and pleat it in with the rest, as Ryan has got quite a bit broader in the back over the last year due to constant parkour training, and the pink shirt was getting too tight. It was a little baffling to try and remember all my pattern-drafting logic from a year ago, such as the fact that one side of the shirt has an extra quarter inch added to the front. This is supposed to help with the placket, somehow, but it’s just folded a couple of times, pressed, turned, and topstitched, and there are no tucks of any sort–so I have no idea why that extra quarter-inch is helpful. I don’t even remember if I included it in this iteration, to be honest.

cuff 2

tacking

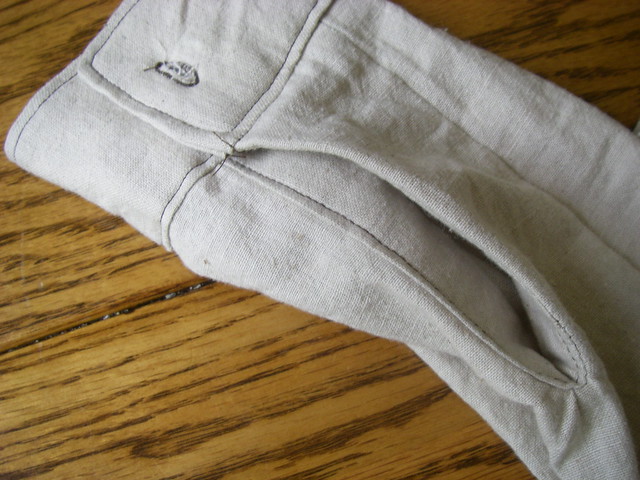
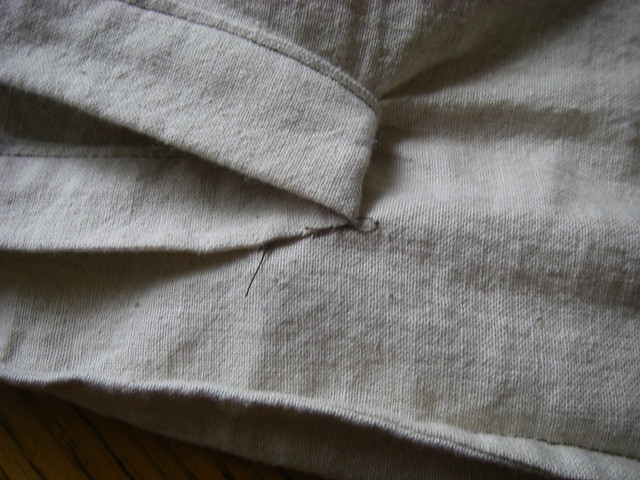
Speaking of tucks. On the last shirt, something went wrong with the sleeve placket drafting and I had to make a tuck in the underside of the placket. I didn’t like it, and didn’t feel like messing with my anciently-drafted piece, so I just did a continuous loop. I justified it because it’s a casual shirt (I also didn’t put interfacing in the collar or cuffs), but then I had to tack it down because it was sticking out, and it puckers in places, so I am not doing that again!
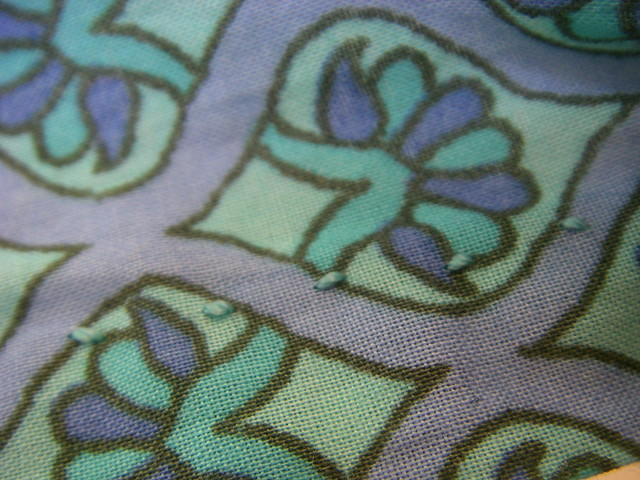
collar 2

Other notes: The collar and collar stand were too long for the neckline, again! I have no idea why. It wasn’t a problem in the first shirt. Luckily, it’s a casual shirt (my motto, apparently), so why would anyone button it all the way up to the top? I didn’t even bother cutting open the buttonhole.
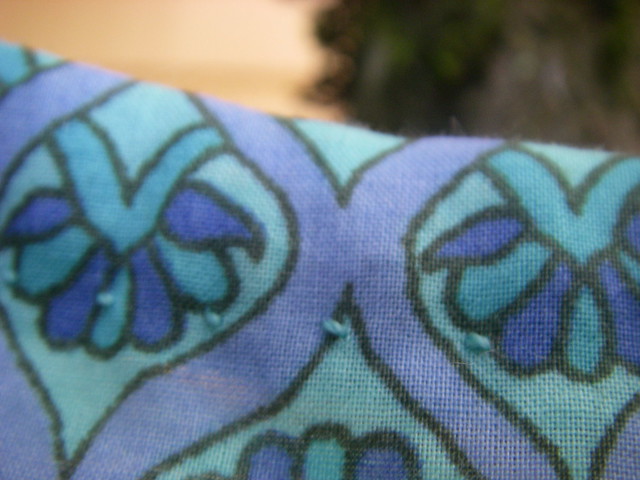
I cried about the buttons. I wanted off-white or brown buttons, and the only ones I had enough of were white shirting buttons, which were way too white for the linen and the dark topstitching. I got very upset and shed real tears, much to the annoyance of everybody, and then I picked out all the best buttons and sewed them on even though they didn’t match. It doesn’t really matter, but in the future I may start buying buttons specifically for certain projects, because there is nothing like having the wrong buttons to kill your enthusiasm.

Both shirts have their ups and downs. The linen one is better fitted and better constructed, but far from perfect. Still, it’s a learning curve, and I’m getting better. And most importantly, it’s fun! I love not having to sew any darts…
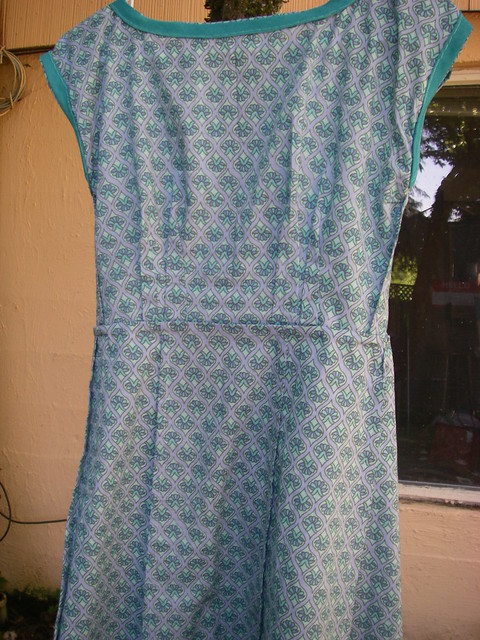
nautical shirtdress

front

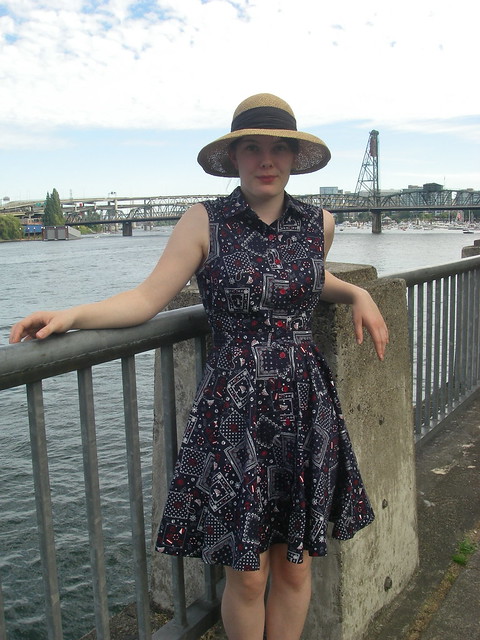
Last winter I decided to make this nautical broadcloth into a breezy summer shirtdress–isn’t it funny how I always have the urge to make sundresses in the dead of winter, and once summer gets into full swing all I can think of is tweed and tights?  In any case, I was without a sewing machine for a solid three months, and so by the time I was able to realize the dress, it was practically summer here in Portland.

side

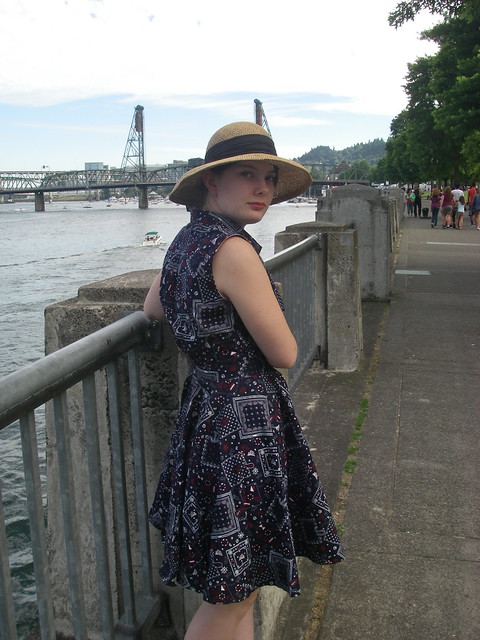
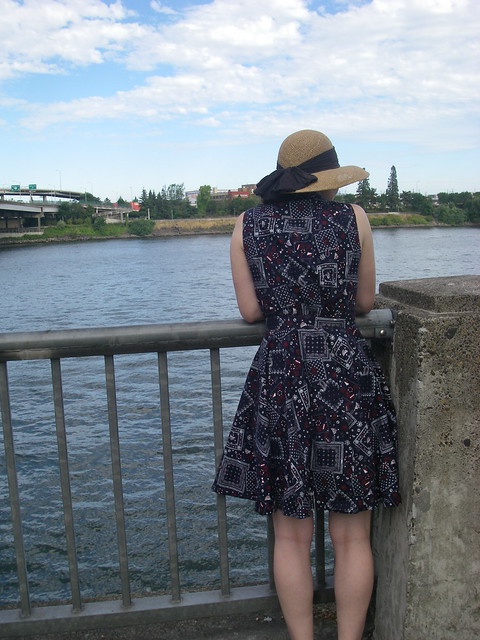
The pattern, of course, is McCall’s 6696, as that is the only shirtdress pattern I have. (I’d like to try the Hawthorn, but I don’t really know if Colette patterns will ever fit my small upper body.) I made some adjustments from my green shirtdress, taking in the waist, lengthening the darts, and trying to make the whole thing generally smaller without tracing a smaller size. I also left off the sleeves, obviously, but the armholes are somewhat too large. I left the back gathers, but combined with the too-big armscyes and my forward shoulders, I feel like it makes the dress look too big and my shoulders look very round. It may be too late at this point, but I might go in and take some of the gathers out because I just don’t care for the way it looks.

back

(In this photo: my terrible posture, and probably half the reason for my square shoulders. I don’t even notice when my shoulders are around my ears, it’s so habitual.)

I used a circle skirt instead of either of the pattern options, because it looks good with a petticoat, and I don’t need a pattern piece for it (the truth comes out! I wear circle skirts all the time because I’m too stingy with my tracing paper to use patterns).

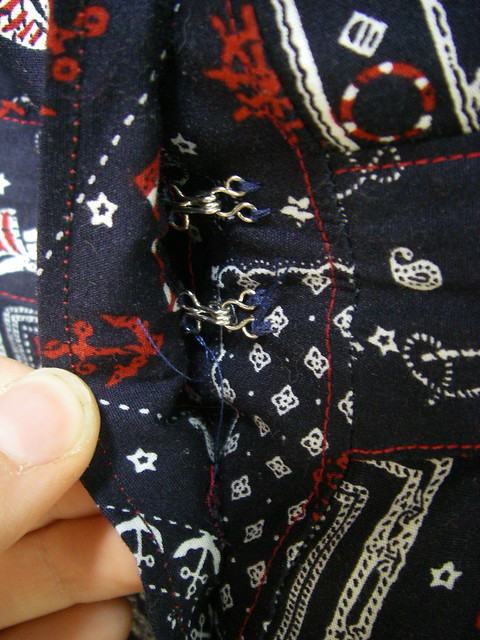
hooks and eyes

I gave the waistband some negative ease, because that’s what I like, but unfortunately forgot about the inevitable gaping that would result. A couple of hooks and eyes fixed that easily enough.

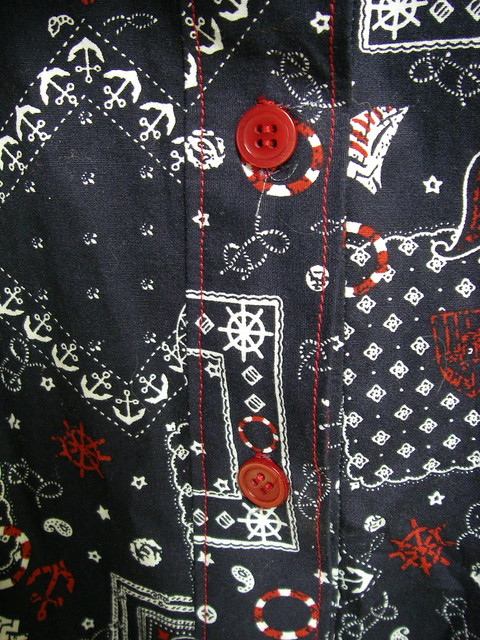
buttons

When I started this dress I was using only my straight stitch machine, and dreading the buttonholes. Then I found a vintage Kenmore with an awesome buttonhole attachment for only $20! Now it’s broken, and I’m not sure how to fix it, but at least I got two garments worth of buttonholes out of it… And the buttons match so well!

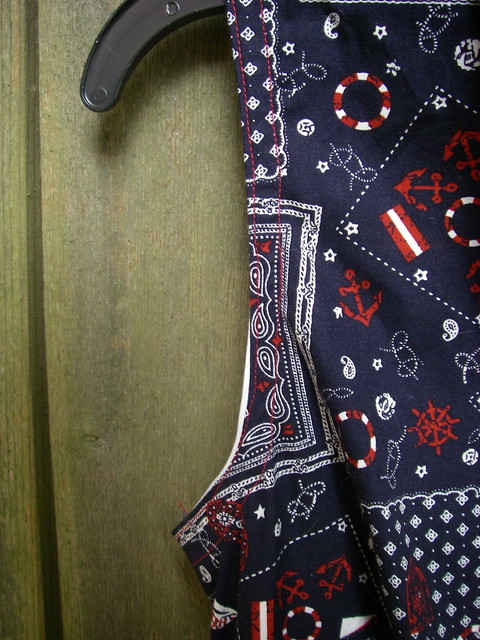
armhole

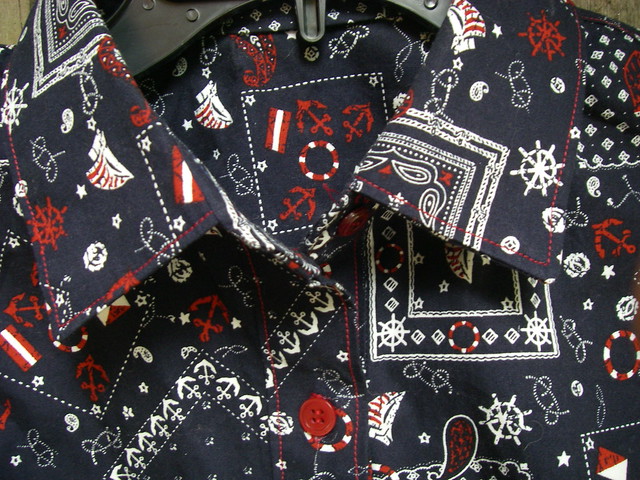
What else… I put the armhole binding on flat, thinking it would be easier that way, but neglected to understitch, so it rolled. Oops. Luckily it’s a busy print. I also tried to fix the collar drafting issue that my last iteration of this pattern had, but even with pinching an inch out of the collar and collar stand pieces, they were still too long! It’s a good thing I never button the top button anyway. I didn’t even bother making the buttonhole functional.

collar

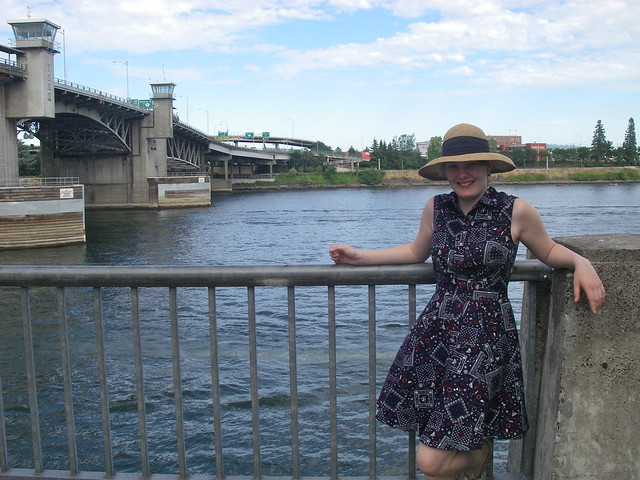
Overall, it’s not perfect (nothing ever is), but I like it a LOT. It’s a good casual dress (worn here with my fantastically grubby Converse), but it also looks great with red lipstick and red heels, and as soon as Zappos restocks those red saltwater sandals in my size, it’ll be a perfect summer outfit! It’s also lots of fun to wear with my giant red petticoat. I’m not sure how well it will transition to winter, as there is a distinct lack of red cardigans in my closet, but it’s definitely a winner for hot weather.

front

bloglovin

Follow my blog with Bloglovin

Though there may be a more streamlined way to do this, I don’t know how to transfer everything about my old blog over to this one, so I really am starting over, and claiming this blog as well as my old one (which, to the best of my knowledge, is not actually accessible by anyone, including myself).

Aqua and Lavender Anna

Anna dress

This fabric is a Lisette lawn that my mother bought for me nearly two years ago, which I have been saving until my sewing skills improved. It was originally destined to be a maxi-length McCall’s 3246, but I have yet to get that pattern fitting perfectly. Or maybe an Ashland? But in the end, it was paired with Anna!

Anna dress

And I think they suit each other very well.

Anna dress

Anna dress

There is relatively little to be said about the process. I narrowed the neckline by about 1/4-1/2″ on either side, to fix the gaping I got on my last Anna. Neckline and sleeves are bias-bound, with decorative turquoise prick-stitching, which also features on the zipper and the hem.

sleeve detail

neckline detail

The inside is entirely french-seamed.

Anna dress inside

On my last Anna, I had stitched the side-seams at 1″, but as this one doesn’t have any stretch, I stitched them at 3/4″. I must have forgotten to do so on my skirt seams, or something, because none of the seams match up at the waistline, but luckily the fabric is busy enough that no one is likely to notice.

Anna dress

I have about a yard left of the fabric, which may actually be plenty for an Ashland if I felt like it. Or a high-waisted gathered skirt…? Or something else entirely.

alice dress

Alice dress

Every year, the theatre department has a big dinner and party at the end of the year to celebrate the graduating seniors. There is food, entertainment, and lots of speeches–and a theme. Last year was Harry Potter, the year before was Space. This year, the theme was “Down the Rabbit Hole.”

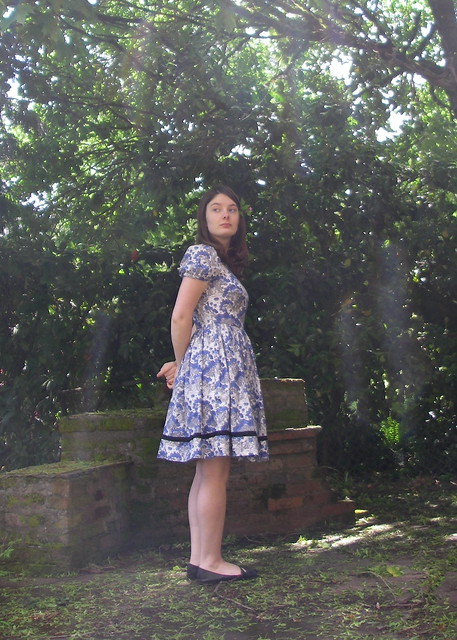
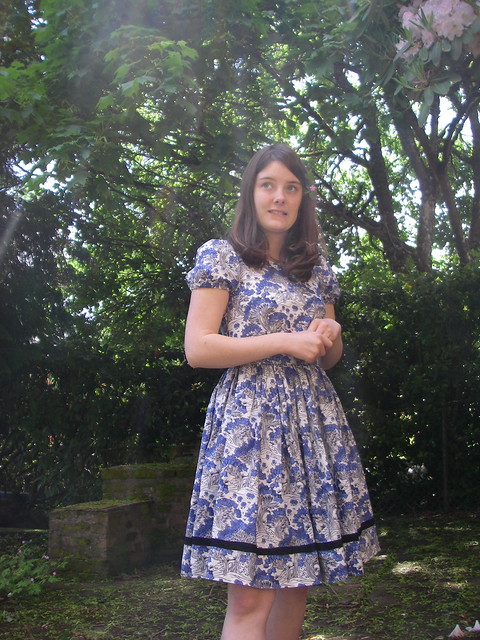
Being named Alice, I have always sort of identified with the Alice books. When I was ten or eleven, my mother made me a fantastic Alice-in-Wonderland dress for Halloween, out of a sheet she had dyed blue herself. I wore it constantly until I developed too much of a bust to squeeze into the bodice anymore. So the senior dinner seemed the perfect opportunity to recreate my favorite childhood dress.

Alice dress

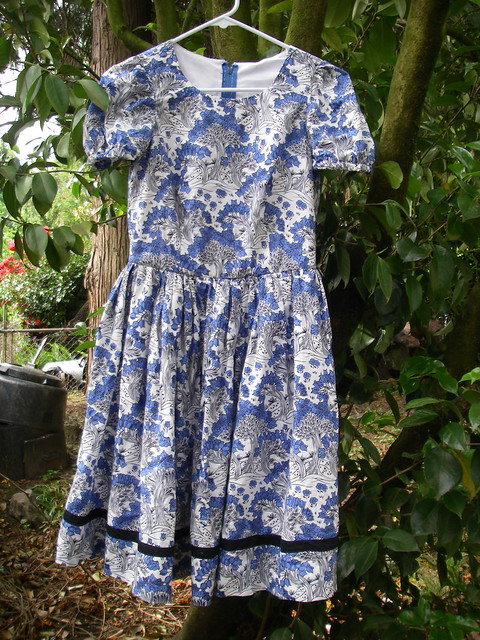
While in London, I went to Goldhawk Road, searching for the perfect fabric. Buying something solid blue seemed too boring, but I found three meters of this beautiful cotton lawn, and it was perfect.

Alice dress

For the bodice, I used McCall’s 5927, a somewhat bland pattern that happened to be in my stash. After much deliberating on what size to cut, I finally settled on a size 4, C cup–which fit better out of the envelope than anything I had ever made before. I shortened the darts by 1/2″, lowered the armhole by 1/4″, and graded out to a size 8 at the waist. It fits more or less perfectly, though there is a little bit of gaping at the back neck, and the waist could be a smidgeon smaller (a matter of personal preference, I like very little ease at the waist). I also deepened the neckline in front, not because it didn’t fit, but because I really don’t care for such a high neckline.

Alice dress

Alice dress (back)

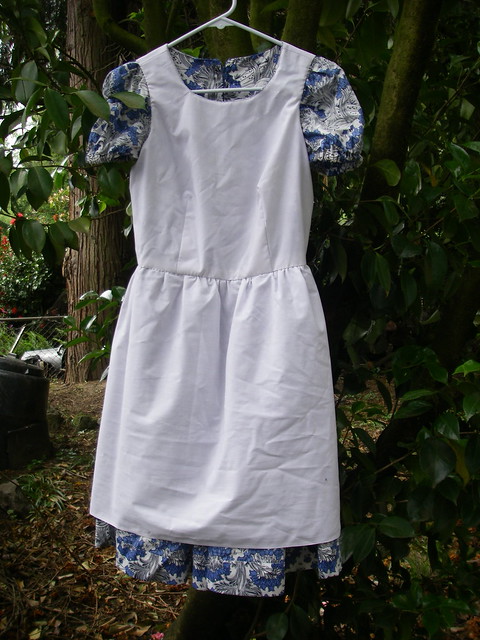
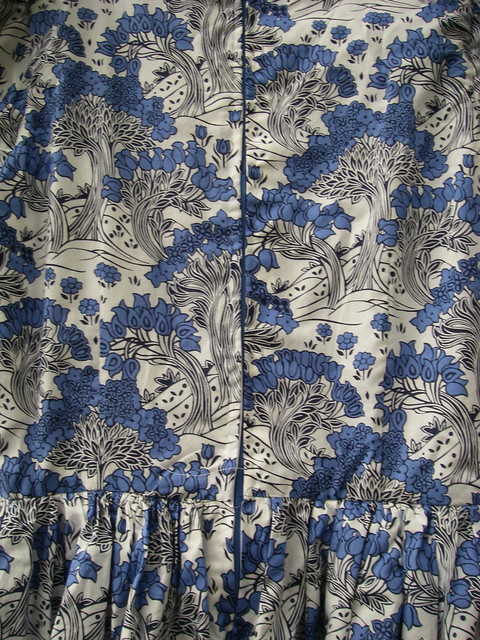
I stole the puffed sleeves from an old 70s pattern I had lying around, and the skirt is simply twice the width of the fabric, gathered. The entire dress is lined, for decency’s sake, in the only white fabric I had lying around–a poly-cotton sheet. Breathability, therefore, is low.

Alice dress (inside-out)

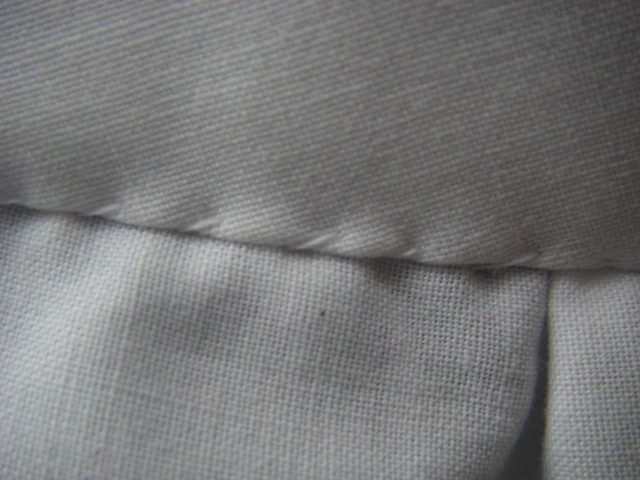
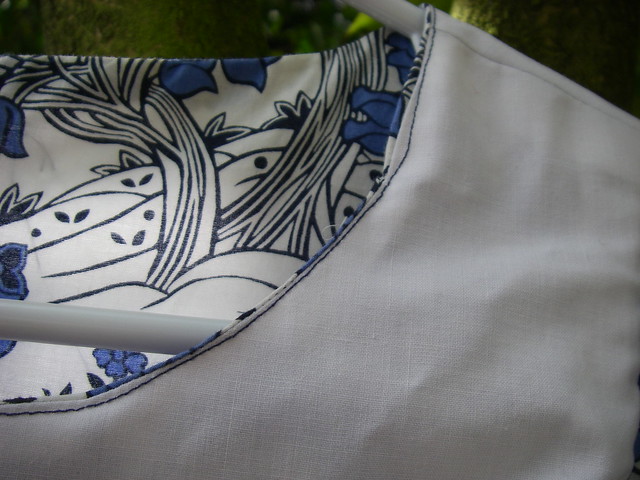
I took great care with the finish of the dress. All the bodice seams are enclosed, and the lining is hand-stitched to the armholes and the skirt.

Alice dress (stitching detail)

I edge-stitched around the neckline…

Alice dress (neckline

Hand-picked the zipper…

Alice dress (zipper)
(Oops, loose thread there.)

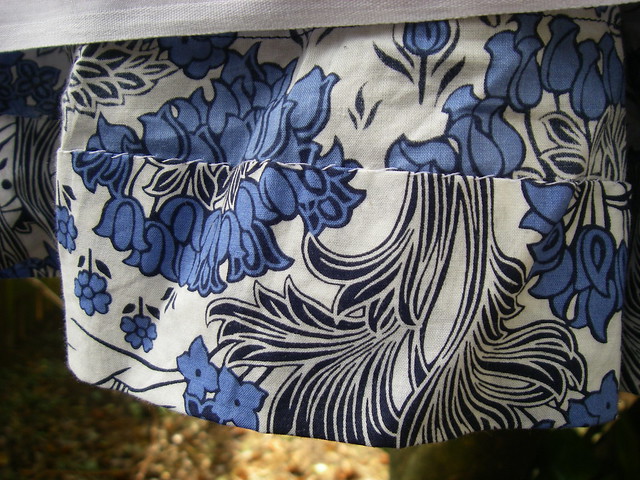
And hand-sewed the hem.

Alice dress (hem)

It is really the nicest-finished dress I have ever made, and one of the best-fitting as well. The only trouble is that it is a little too adorable. Better suited to 10-year-old Alice than 20-year-old Alice…

I might remove the sleeves, and possibly lower the neckline a bit more, which would make it more of a quirky sundress, and less of an Alice-in-Wonderland costume. Alternatively, I could take it all apart and salvage the gorgeous fabric, but that seems like a sad waste of many hours. Or maybe I don’t care that it’s a dress a little girl could wear with equal composure… Thoughts? Suggestions?

Alice dress
(I just saw my neighbor looking at me from over the fence, and got all self-conscious.)

daffodils and yellow wool

Spring has come in Dublin. The air is balmy, the sun appears occasionally, and hearts are light (when they aren’t laden with apprehension and homework). I leave Ireland in just a little over two weeks, and a week after that I’ll be home! I’m definitely a little sad that I haven’t done everything I wanted to do while I was here, but I suppose that just means I’ll have to come back.

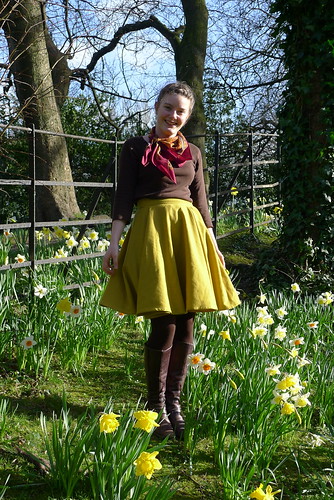
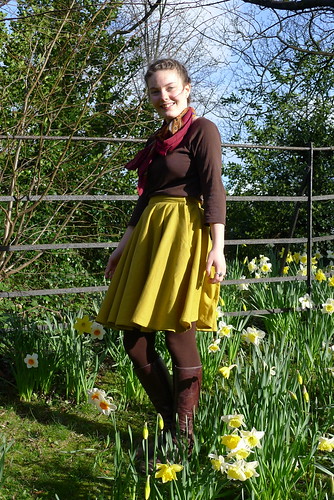
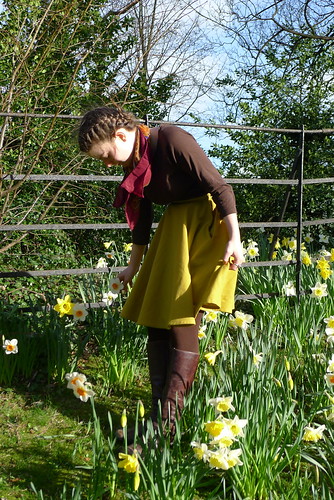
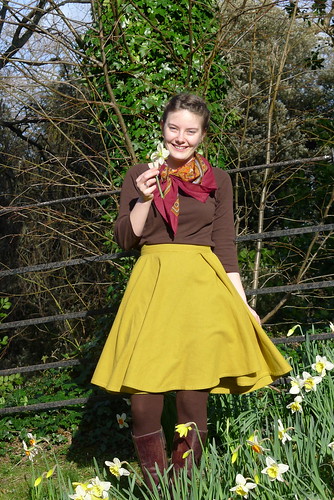
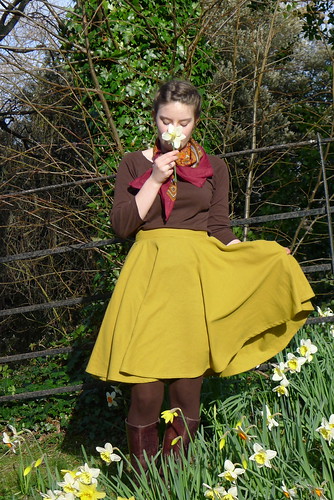
One sunny day a couple of weeks ago, I had my friend Sullivan take pictures of my yellow skirt in St. Stephen’s Green, surrounded by daffodils. Lots of yellow!

yellow skirt

The skirt is a basic circle skirt made of some (unfortunately slightly moth-eaten) wool from my mother’s stash. I made it in a couple of hours at my parents’ house this winter, and since I didn’t have a zipper I opted for a placket and snaps instead. Lucky thing, because the waistband turned out to be too big and the placket made for easier adjustment.

yellow skirt

yellow skirt

The yellow is not quite the perfect shade of yellow, and for the first couple of months I barely wore the skirt at all! It felt oddly-proportioned and I never knew what to wear it with–I don’t wear black much but didn’t know what else to pair with such a yellow. I was actually thinking of leaving it in Dublin to make more room in my suitcase, but then I found these brown boots in a charity shop for three euros! Having the right shoes made it so much easier to wear. I guess it’ll be traveling back with me after all! There will be loads of new styling options at home, so I’m sure it’ll get a lot of wear.

yellow skirt

yellow skirt

bloglovin

Follow my blog with Bloglovin!

This is a bit of a silly post as I don’t have much to say, besides that I’ve joined Bloglovin’, but I have to say it in order to claim my blog. So, if you’re reading this, and like my blog, please follow it!

And I promise I’ll post something with pretty pictures and handmade clothes soon.

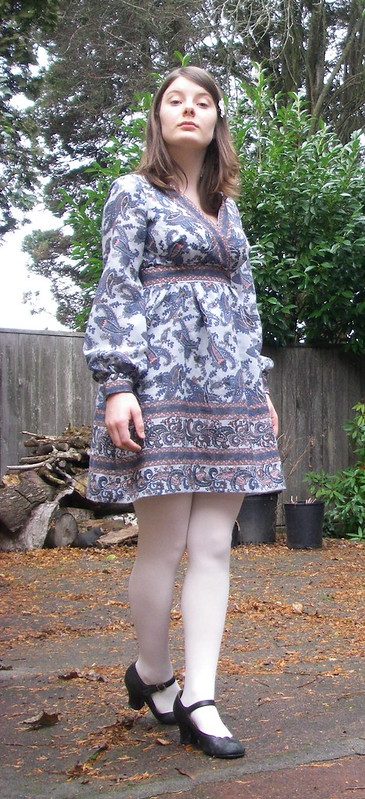
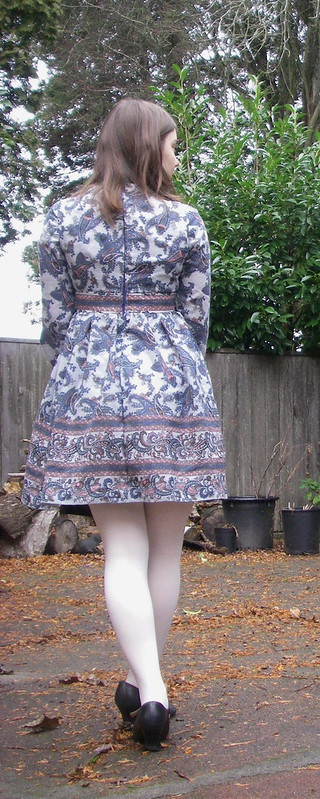
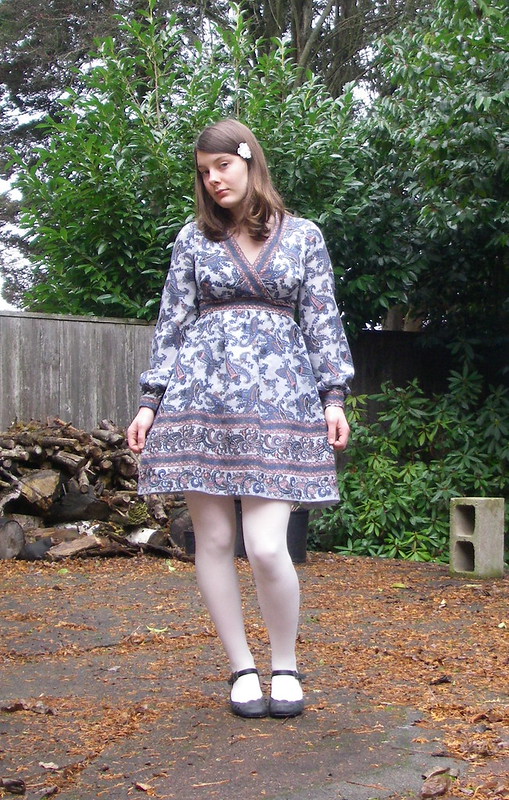
crazy paisley dress

Well folks, it’s my first(ish) post on the new blog AND my first post from Dublin, where I’ll be living until mid-April! How thrilling! I promise there will eventually be photos of my handsewn items in Dublin, but first I have a couple of garments that I photographed before I left Portland.

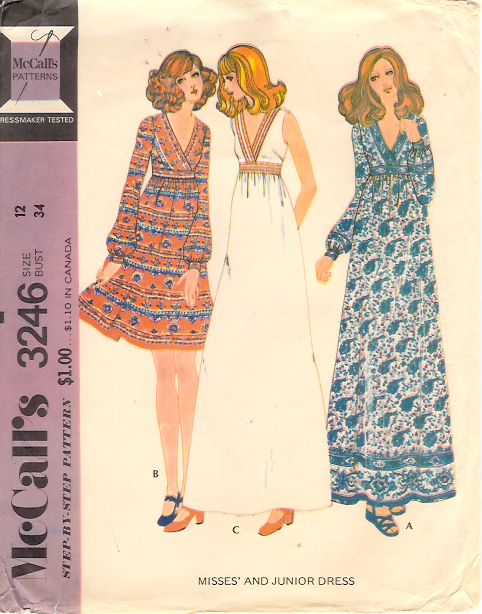
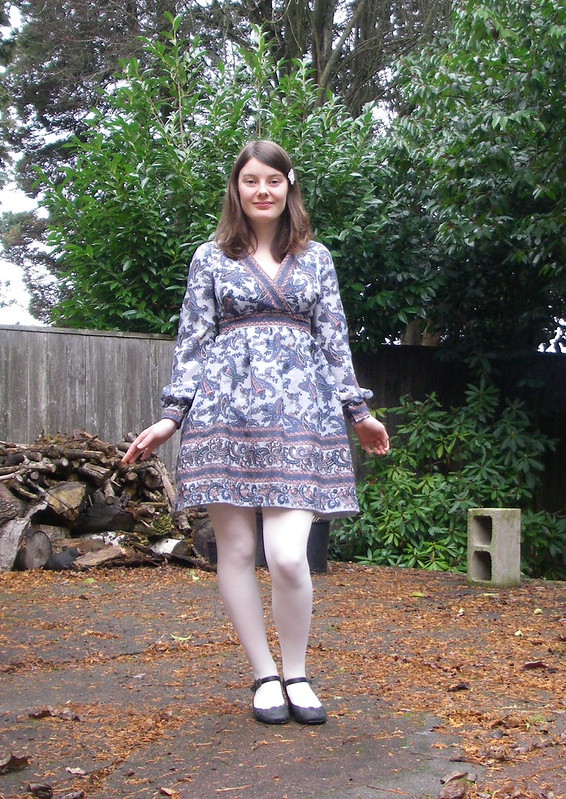
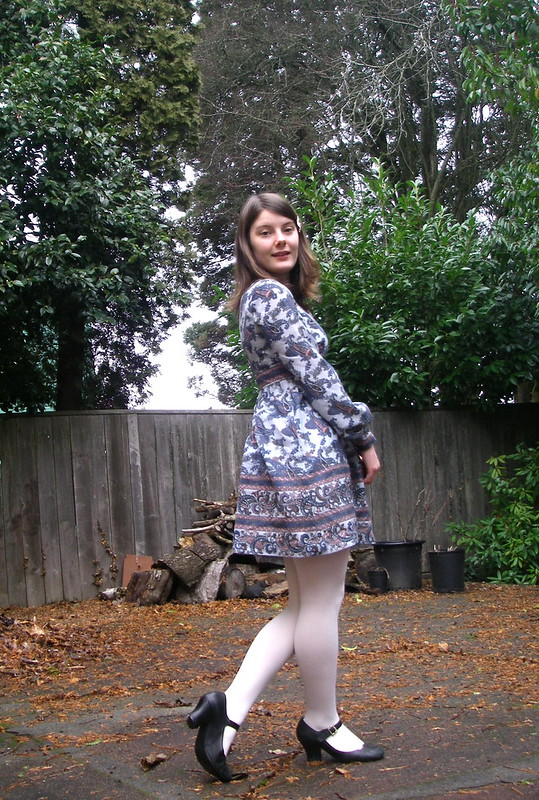
The first of these, I actually began working on close to a year ago, and finished last summer. The pattern is McCall’s 3246 from the early 70s.

photo credit: vintage pattern wiki

I have made this dress before, back in the days when I thought you just cut a pattern out and it fit perfectly without modification. That was the dress that taught me that’s not true (also, that quilting cotton is not always a good choice of fabric). It looked okay in pictures, but I felt restricted and uncomfortable wearing it, and the crossover bodice gaped like mad, so I gave it to my mother to use in quilting. I really liked the idea of the dress, however, and when I was given this crazy poly/wool paisley border print, I knew it was meant to be.

mccall's 3246 (70s)

The fabric is very loosely woven and pretty sheer, so I underlined it with a poly cotton bedsheet. Given that I had actual 100% organic cotton bedsheets lying around, this was a dumb choice. The underlining was stiff and hated to take a press, while the fashion fabric was floppy and unstable, and also hated to take a press. Consequently, my darts are a bit, well, lumpy. Luckily, this fabric hides all the flaws in its mad pattern.

mccall's 3246 (70s)

I did make a muslin for this dress, but be warned, dear readers: if you don’t do a muslin right, it is a waste of time. I didn’t put sleeves on my muslin, which would have alerted me to all manner of problems. I also didn’t put a waistband on my muslin. Lastly, I made too large of an FBA, but rather than addressing this directly, I just sort of pinned the bodice front pieces together where it looked least bad. It was all very foolish, as I realized when I stood in front of the mirror a couple of months later with a half-made bodice in my fashion fabric. I lengthened darts, I shortened darts, I lengthened them again… in the end I did an SBA to my altered pattern piece and carefully cut the new bodice piece out of the old bodice piece. It was a mess!

mccall's 3246 (70s)
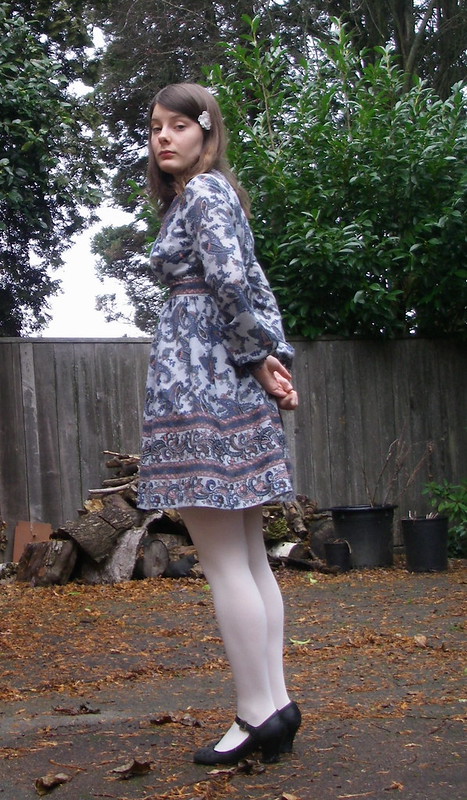
(I don’t know why there are so many pictures of me looking down my nose at the camera. It’s a major trend and I don’t know how it happens.)

Other changes I made, besides the FBA:
• I took a total of two inches (I think!) out of the bodice width, and altered the waistband accordingly. The bodice is fine but the waistband is a bit snug so I must have done something wrong.
• I made the shoulders narrower by 1/2″ each
• I added darts from the waistband up, as part of the FBA
• I made the skirt a lot shorter, thinking I would be wearing it with rubber boots (I prefer to wear rubber boots with miniskirts). I have yet to wear it with rubber boots but I do like the length!

mccall's 3246 (70s)

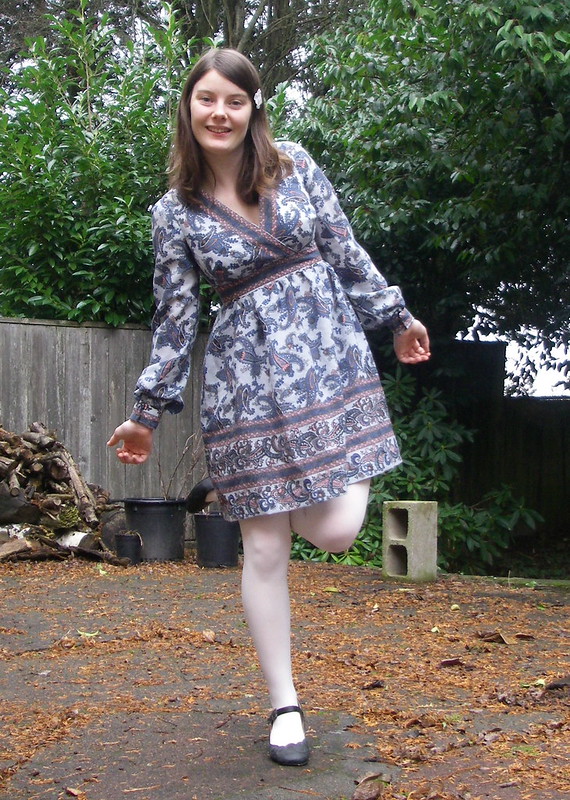
I will admit I don’t love this dress. I feel super cute in it and I do wear it sometimes, but the fit is still weird, especially with the sleeves and the slightly-too-tight waistband. The polyester also gets pretty gross to wear in humidity, but I live in a humid climate… all this combined means I don’t reach for it too often, unfortunately.

mccall's 3246 (70s)

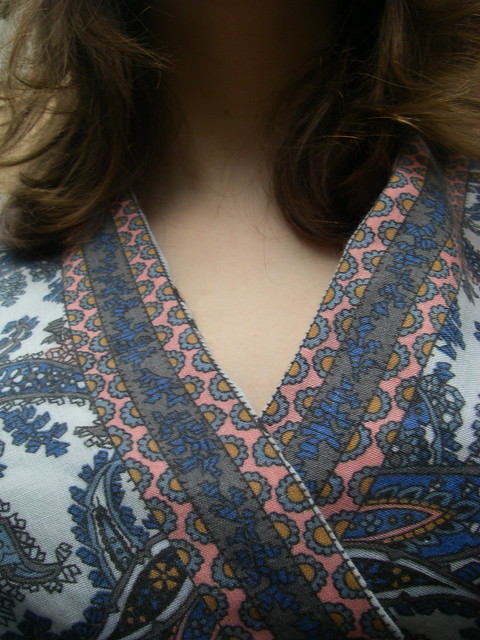
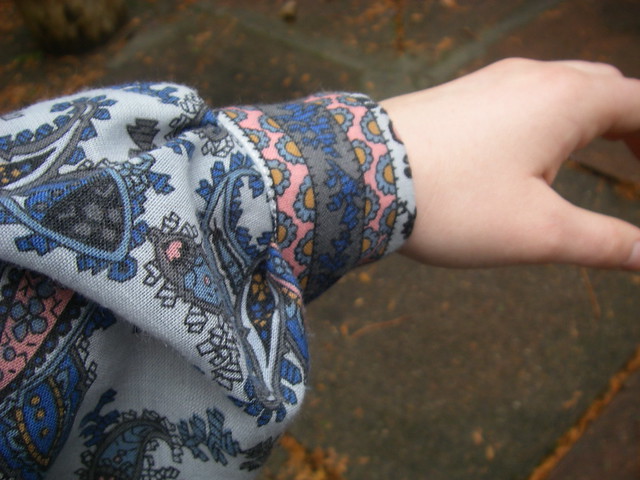
Here is a detail of the crossover bodice and one cuff. The sleeves and cuffs of this dress are probably my favorite thing about the pattern.

mccall's 3246 (70s)

mccall's 3246 (70s)

I tried to have a bit of fun with this photoshoot (if it can be called that…) since photos are fun and I hate looking awkward in front of a camera. If you don’t feel awkward, you don’t look awkward! Still, I’m always a little worried that one of my roommates is going to look out the window and see me posing by myself in the backyard.

mccall's 3246 (70s)

mccall's 3246 (70s)

Oh, and since I am in Dublin, here’s a picture of me in a pub:

in a pub

alma blouse

Well, I’m back! What with school and all, I’ve hardly had time to sew, and it doesn’t help that both of my sewing machines are broken! I did make a Secret Santa present using the sewing machines in the costume shop, but other than that I haven’t been able to sew since I don’t know when. Now we’re in the middle of winter break, though, and I’ve been out in the country using my mom’s fancy Juki to make her an Alma blouse!

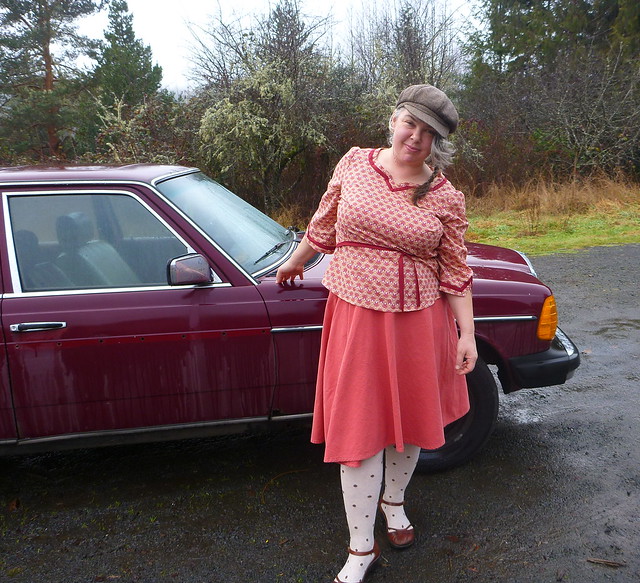
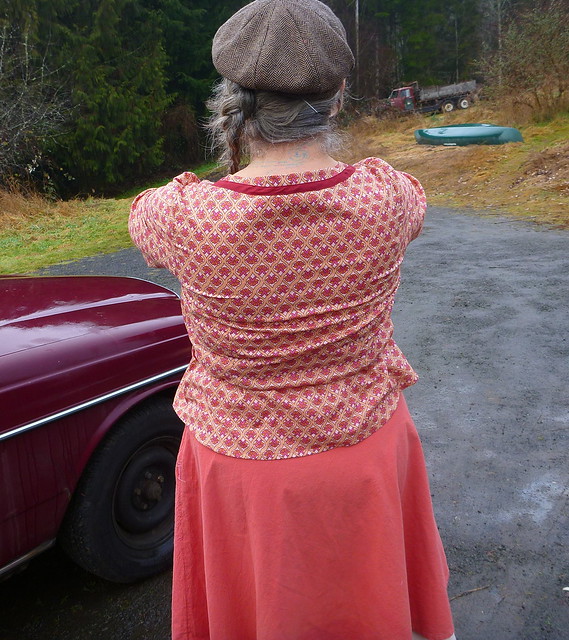
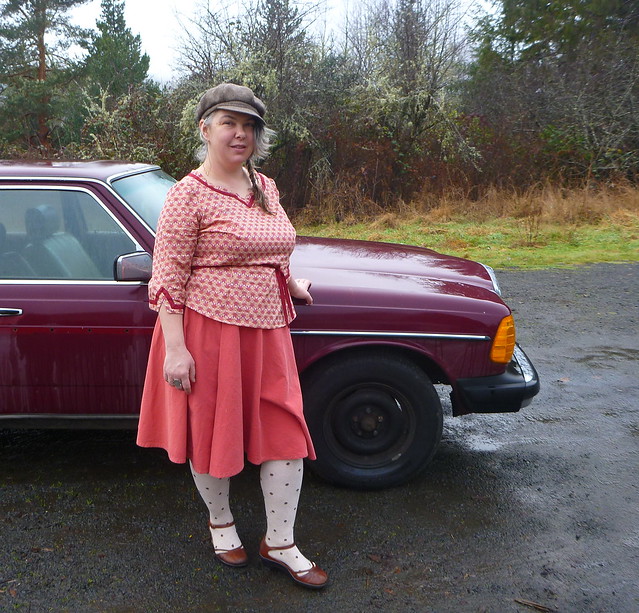
Alma and car

When Mother first bought this lawn, she described a fitted, vaguely medieval, possibly button-back blouse with 3/4-length sleeves. We decided that the Alma blouse had the right fit, and the sleeves were easily modified. It is also such a nice, versatile, modifiable pattern, and falls within both of our sizing ranges. I can’t wait to sew myself a version in white geometric-patterned cotton with a forest green yoke, or a little floaty summer blouse in lawn or voile with cap sleeves…

I cut a size 16, going by Mother’s upper bust measurement, and did a full bust adjustment. At first I added a total of three inches to the bust, but after the first muslin, I had to reduce the bust by an inch (interestingly, this happened with the last FBA I did as well–I’m really not sure why). I also did a forward shoulder adjustment of probably 1 1/4″.

Alma and car

I had a lot of trouble fitting the sleeves, and as you can see, they’re still not quite right. I narrowed the shoulders by about 5/8″, and put that fabric into the sleeve cap instead. I also did a full arm adjustment, and cut the sleeves on the bias. They fit a lot better in the lawn than they did in the poly-cotton sheet I was using for the muslin, and Mother can move her arms pretty freely, but I’m still not entirely satisfied. Sleeves are hard!

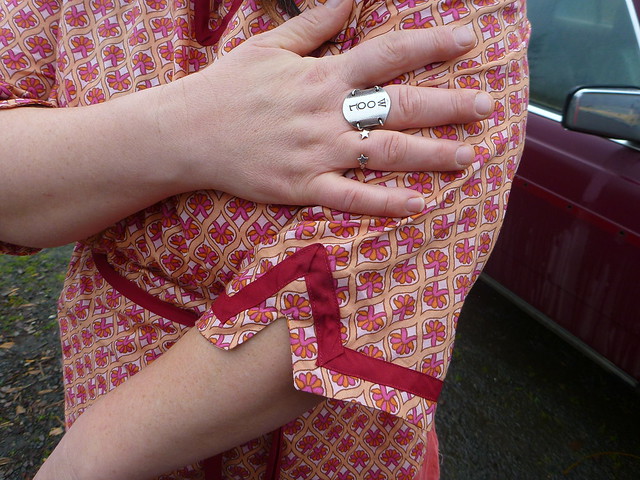
sleeve detail

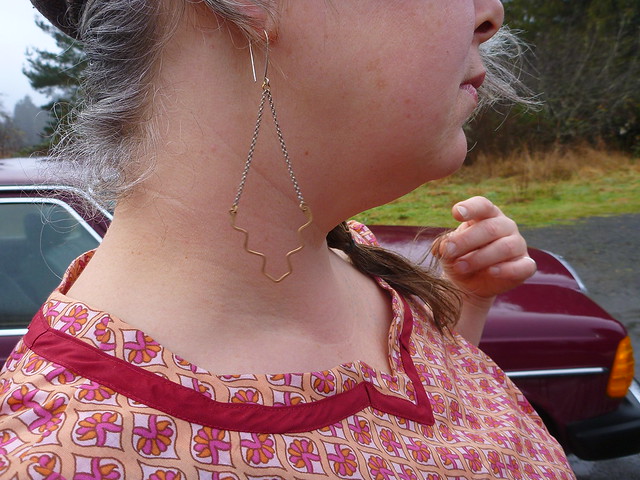
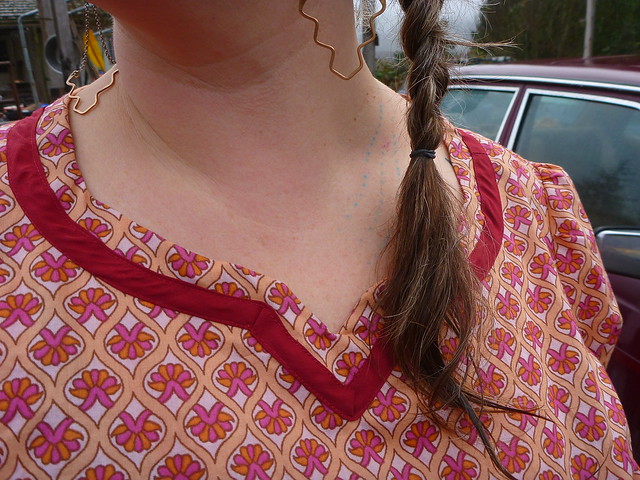
In addition to changing the sleeve length, I gave the sleeves a little notch that matched the neckline. I trimmed both sleeves and the neckline with some homemade burgundy bias tape.

blouse and earring

Alma neckline

I attempted to do a swayback adjustment because of the wrinkles in back. I don’t think I did it right, but there are fewer wrinkles than there were…

Alma back

Alma zip

I used a regular zipper instead of an invisible one, for no particular reason. It is still pretty discreet. The belt shown here is the leftover burgundy bias tape.

Alma and car

I also made the skirt that Mother is wearing, which was last year’s Christmas present. It is something like a quarter circle, made out of something woven but stretchy from Fabric Depot. It matches the blouse perfectly!

I’m going home tomorrow with a borrowed sewing machine, to sew like mad until I leave for Ireland in a week! I’m hoping to make a shirtdress, two circle skirts, and to finish the Macaron I was sewing when my machine broke. And if I can accomplish all that, there’s a million other things I’d like to sew…but I’m trying to keep my to-do list short!